Advertisements
You don’t need a designer budget to achieve that flawless, custom-tailored silhouette on your favorite pants. Mastering a few basic Hem Alterations is the ultimate shortcut to making affordable off-the-rack trousers look like expensive, bespoke garments.
By adjusting trouser length and modifying leg openings, you eliminate awkward bunching at the ankles and instantly refine the drape of your clothing. Tailoring your bottoms to hit precisely at the right footwear break elevates your entire outfit with minimal cost and effort.
This quick guide breaks down five essential tailoring adjustments that turn $40 high-street pants into a high-end wardrobe staple. Discover how small adjustments can deliver maximum sartorial impact for a fraction of the cost.
Advertisements
The Undeniable Impact of a Perfect Hem
A well-executed hem is not merely a detail; it is a foundational element that dictates how trousers sit on your shoes and legs, fundamentally altering the perceived quality of the garment.
An improperly hemmed pair of trousers can instantly cheapen an otherwise stylish outfit, creating a sloppy or ill-fitting impression.
Conversely, a precisely tailored hem can elevate even the most affordable high-street trousers, making them appear custom-made and significantly more expensive.
Advertisements
This critical adjustment ensures that the fabric falls correctly, creating clean lines and a polished silhouette. The difference is often subtle yet profoundly impactful on your overall appearance.
Understanding the importance of this seemingly minor detail is the first step in mastering the art of transforming your wardrobe. With the right hem, your $40 trousers can easily rival those costing hundreds, proving that style often lies in the details rather than the price tag.
Why Hem Length Matters for Trousers
The correct hem length for trousers is paramount, influencing not only comfort but also the visual flow of your outfit.
A hem that is too long can cause fabric to bunch awkwardly around the ankles, creating a messy look and potentially tripping hazards. This excess material detracts from the clean lines essential for a sophisticated aesthetic.
Conversely, a hem that is too short can make trousers appear ill-fitting and disrupt the intended silhouette, especially with wider leg styles.
The ideal length varies based on trouser style, shoe choice, and personal preference, but generally, it should allow the fabric to gently kiss the top of your shoes without puddling.
Achieving this balance is crucial for creating a harmonious and polished appearance, ensuring that the trousers complement your footwear and body proportions. Mastering this aspect is key to making 5 Simple Hem Alterations truly effective.
The Psychological Effect of a Tailored Fit
Wearing clothes that fit impeccably has a profound psychological impact, boosting confidence and enhancing self-perception. When trousers are tailored to your exact measurements, they not only look better but also feel more comfortable, allowing for unrestricted movement and a sense of ease.
This tailored sensation communicates attention to detail and personal care, projecting an image of professionalism and sophistication.
It demonstrates an understanding that clothing is an extension of oneself and an investment in personal presentation. The subtle difference a perfect hem makes can thus translate into significant improvements in how you carry yourself.
The feeling of wearing custom-tailored garments, even if achieved through simple alterations, fosters a sense of pride and well-being. This contributes to the overall appeal of applying 5 Simple Hem Alterations to your wardrobe.
Essential Tools for DIY Hem Alterations
Embarking on the journey of tailoring your own trousers requires a basic set of tools, most of which are readily available and inexpensive.
Having the right equipment ensures precision, efficiency, and a professional finish for your hem alterations. Investing in these essentials is a small price to pay for the significant upgrade you’ll achieve.
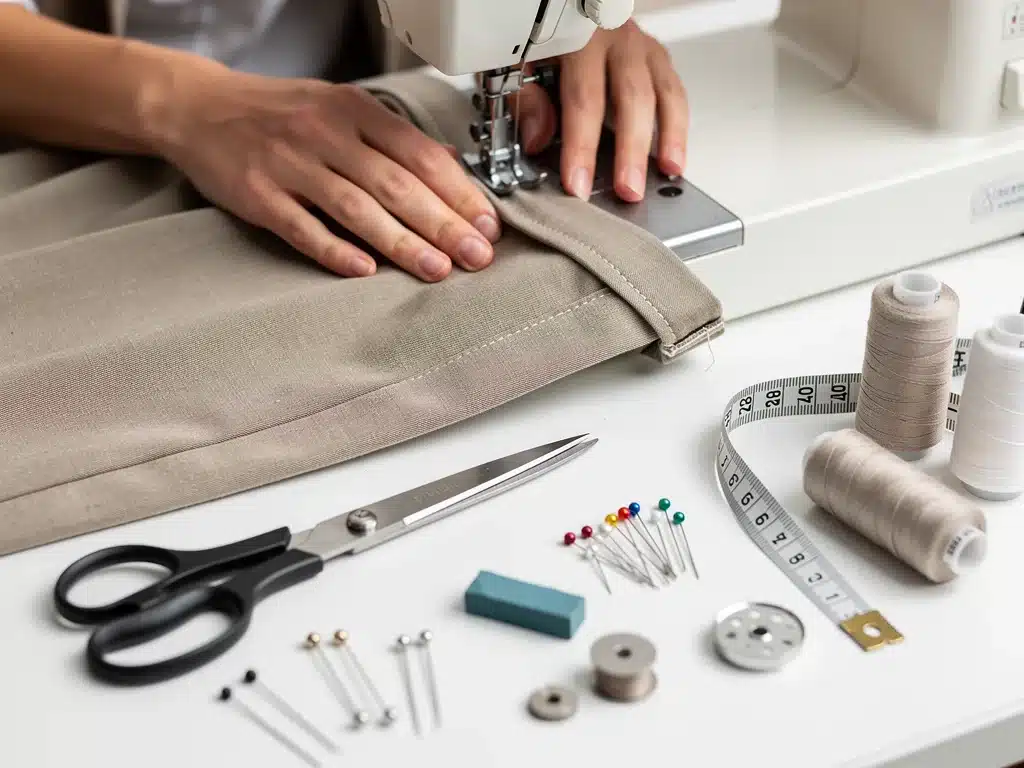
A measuring tape is indispensable for accurately determining the desired length, while a good pair of fabric shears ensures clean, crisp cuts. Sewing pins are crucial for holding the fabric in place before stitching, and a seam ripper is invaluable for correcting any mistakes or removing existing hems.
For stitching, a sewing machine is ideal for speed and durability, but hand-sewing needles and thread are perfectly adequate for simpler hems or if you prefer a more traditional approach.
A good iron and ironing board are also essential for pressing seams flat, giving your alterations a professional, crisp finish.
Choosing the Right Thread and Needles
Selecting appropriate thread and needles is a critical step often overlooked in DIY alterations, yet it significantly impacts the durability and appearance of your hem.
For most trouser fabrics, a good quality polyester all-purpose thread in a color that matches your trousers closely is ideal. Polyester thread is strong, resists shrinking, and offers good colorfastness.
Regarding needles, a universal machine needle (size 80/12 or 90/14) works well for most medium-weight trouser fabrics. For hand sewing, sharp, medium-length needles are versatile.
Always ensure your needle is sharp and free of burrs to prevent snagging the fabric, which can compromise the integrity of your hem.
Having a selection of thread colors and needle sizes on hand will prepare you for various fabric types and ensure your 5 Simple Hem Alterations are executed flawlessly. This attention to detail will elevate the quality of your finished product.
Mastering the Measuring and Marking Techniques
Accurate measuring and precise marking are the cornerstones of any successful hem alteration. Begin by trying on the trousers with the shoes you intend to wear with them, as shoe height dramatically affects the optimal hem length.
Have a friend mark the desired hemline with pins or tailor’s chalk while you stand naturally.
Once marked, lay the trousers flat and use a measuring tape to ensure the hemline is even all around. Add an allowance for the hem itself – typically 1 to 1.5 inches for a double-fold hem – and mark the cutting line.
This method ensures consistency and prevents uneven hems, which are a common pitfall for beginners.
Practicing these techniques will build your confidence and accuracy, making every alteration process smoother and more professional. Precise preparation is key to achieving a truly custom-tailored look with 5 Simple Hem Alterations.
The Classic Single-Fold Hem
The single-fold hem is one of the simplest and quickest hem alterations, ideal for lightweight fabrics or when you want to minimize bulk.
This method involves folding the fabric once to the desired length and securing it with a stitch. It’s a clean, straightforward approach that yields a neat finish with minimal effort.
This hem is particularly suitable for casual trousers or those made from fabrics that don’t fray easily. While it may not offer the same level of durability as a double-fold hem, its simplicity makes it an excellent starting point for beginners.
It provides a quick and effective way to adjust trouser length without extensive sewing experience.
Mastering the single-fold hem is an essential skill in your alteration repertoire, allowing for rapid adjustments that instantly improve the fit and appearance of your high-street trousers. It’s a fundamental technique among the 5 Simple Hem Alterations.
Step-by-Step Guide to a Clean Single Fold
To execute a clean single-fold hem, start by accurately marking your desired finished length while wearing the trousers and appropriate shoes. Add a 1-inch seam allowance below this mark, then trim any excess fabric. This initial precision is crucial for a professional outcome.
Next, press the raw edge up by 1 inch towards the inside of the trouser leg, using an iron to create a crisp fold. Pin this fold securely in place, ensuring the hemline remains even around the entire circumference. This pressing step is vital for achieving a sharp, neat edge before stitching.
Finally, stitch the hem in place using your sewing machine or by hand, sewing close to the folded edge. A straight stitch is generally sufficient for durability and a clean look. Once stitched, give the hem a final press to set the stitches and remove any wrinkles, completing your custom alteration.
When to Opt for a Single-Fold Hem
A single-fold hem is best utilized for trousers made from lightweight fabrics such as linen, rayon, or thin cotton blends where bulk is a concern.
The minimal layers of fabric ensure a smooth drape and prevent any noticeable ridge on the exterior of the garment. This method is perfect for maintaining the delicate flow of softer materials.
It is also a good choice for casual trousers or those with a very relaxed fit, where extreme durability is not the primary concern.
The quick application makes it suitable for last-minute adjustments or when you need a fast solution to an overly long pair of trousers. This versatility is why it’s a key part of 5 Simple Hem Alterations.
Furthermore, if you are new to sewing and looking for an entry-level alteration, the single-fold hem offers a manageable challenge with satisfying results. It builds confidence for more complex techniques while immediately improving your garment’s fit.
The Durable Double-Fold Hem
The double-fold hem is a robust and widely used alteration technique, providing a neat, enclosed finish that is highly durable.
This method involves folding the fabric twice before stitching, effectively encasing the raw edge within the hem. It’s ideal for a wide range of trouser fabrics, from medium-weight cottons to heavier wool blends.
The double-fold hem offers superior protection against fraying and adds a bit of weight to the bottom of the trouser leg, which can improve the drape and hang of the fabric.
Its clean appearance from both the inside and outside makes it a professional choice for almost any type of trouser, from casual chinos to more formal dress pants.
Mastering this technique is a significant step in achieving truly custom-tailored results, ensuring your trousers not only look good but also withstand regular wear and washing. This hem is a cornerstone of 5 Simple Hem Alterations for its blend of aesthetics and longevity.
Achieving a Professional Double Fold
To create a professional double-fold hem, begin by marking your desired finished length and adding a 2-inch hem allowance below this line.
Trim any excess fabric, ensuring a clean, straight edge. This generous allowance provides ample material for the double fold, contributing to a substantial and neat finish.
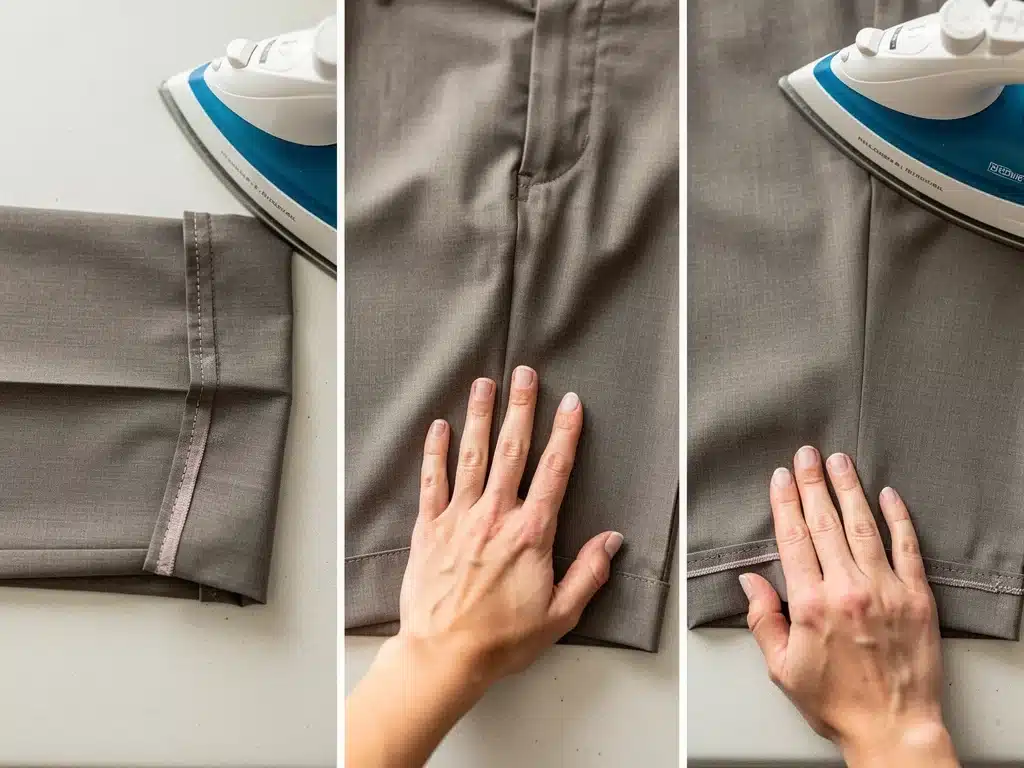
First, press the raw edge up by 1 inch towards the inside of the trouser leg, creating a crisp initial fold. Then, fold the hem up another 1 inch, encasing the raw edge completely.
Press thoroughly again, ensuring both folds are sharp and even around the entire circumference of the trouser leg, then secure with pins.
Stitch the hem in place, sewing close to the top folded edge. A straight stitch is commonly used, providing a strong and discreet finish. After stitching, press the hem one final time to meld the fabric layers and achieve a smooth, professional appearance, completing this durable alteration.
Best Fabrics for a Double-Fold Hem
The double-fold hem excels on medium to heavy-weight fabrics that can support the extra layers without adding excessive bulk.
Cotton twill, denim, wool blends, and sturdy synthetic materials are excellent candidates for this type of alteration. The added fabric weight at the hem often helps these materials drape better.
For structured trousers, such as chinos, jeans, or dress pants, the double-fold hem provides the necessary reinforcement and a clean finish that complements their design.
It prevents the hem from curling or losing its shape, maintaining a crisp line throughout the life of the garment. This makes it an invaluable technique when performing 5 Simple Hem Alterations.
While it can be adapted for lighter fabrics, care must be taken to ensure it doesn’t create an overly bulky or stiff hem. For most high-street trousers, especially those made from common blends, the double-fold hem is a reliable and aesthetically pleasing choice.
The Invisible Blind Hem Stitch
The invisible blind hem stitch is the gold standard for achieving a truly custom-tailored look, as it creates a hem that is virtually undetectable from the outside of the garment.
This technique involves picking up only a few threads from the main fabric, resulting in tiny, almost invisible stitches on the exterior. It’s particularly favored for dress trousers and formal wear.
While it requires a bit more precision and practice than a simple straight stitch, the effort is well worth the sophisticated outcome.
A blind hem machine can execute this stitch quickly and flawlessly, but it can also be achieved by hand for equally impressive results. The beauty of this hem lies in its ability to let the fabric’s drape speak for itself.
Incorporating the invisible blind hem is a key strategy when aiming for 5 Simple Hem Alterations, as it elevates the perceived quality of the garment significantly. It’s a hallmark of professional tailoring that you can master at home.
Hand-Sewing a Flawless Blind Hem
Hand-sewing a flawless blind hem requires patience and attention to detail. Begin by preparing a double-fold hem, pressing it crisply. Then, fold the hem allowance back so that about 1/4 inch of the top folded edge is exposed. This creates a small ledge for your stitches, making them less visible.
Using a fine needle and matching thread, anchor your thread inside the hem. Then, pick up just one or two threads from the main trouser fabric, directly above the folded edge, and then pass the needle through a small portion of the folded hem.
Continue this process, making small, even stitches approximately 1/4 to 1/2 inch apart.
The goal is to keep the stitches loose enough not to pucker the fabric, yet secure enough to hold the hem. When done correctly, the stitches will blend seamlessly into the fabric, creating an almost invisible finish. This technique exemplifies the precision needed for 5 Simple Hem Alterations.
Machine Blind Hemming for Efficiency
For those with a sewing machine equipped with a blind hem stitch setting and a blind hem foot, achieving an invisible hem becomes significantly faster and more consistent.
The machine foot is designed to guide the fabric, creating the characteristic skip stitch that catches only a few threads from the main garment.
Start by preparing your double-fold hem as usual, then position the fabric under the blind hem foot according to your machine’s instructions.
Adjust your machine’s stitch length and width settings to ensure the needle just barely catches the main fabric while stitching through the hem allowance. Practice on scrap fabric first to perfect your settings.
While machine blind hemming offers efficiency, a final press is crucial to flatten the stitches and ensure the hem lies perfectly smooth. This method provides a professional finish with speed, making it an excellent option for upgrading multiple pairs of trousers as part of your 5 Simple Hem Alterations.
Customizing the Hem Finish: Cuffs and Tapering
Beyond basic length adjustments, customizing the hem finish with elements like cuffs or subtle tapering can further enhance the custom-tailored appearance of your high-street trousers. These details add a touch of sophistication and can significantly alter the overall silhouette of the garment.
Cuffs, for instance, evoke a classic, sartorial elegance, while tapering provides a more modern, streamlined look.
Incorporating these advanced techniques demonstrates a keen eye for detail and a commitment to personal style, moving beyond mere functionality to genuine sartorial expression.
These customizations are particularly effective in making inexpensive trousers appear far more bespoke and thoughtfully designed. They are advanced steps in the realm of 5 Simple Hem Alterations.
Adding Cuffs for a Refined Look
Adding cuffs to trousers is a classic tailoring detail that instantly elevates their formality and perceived quality.
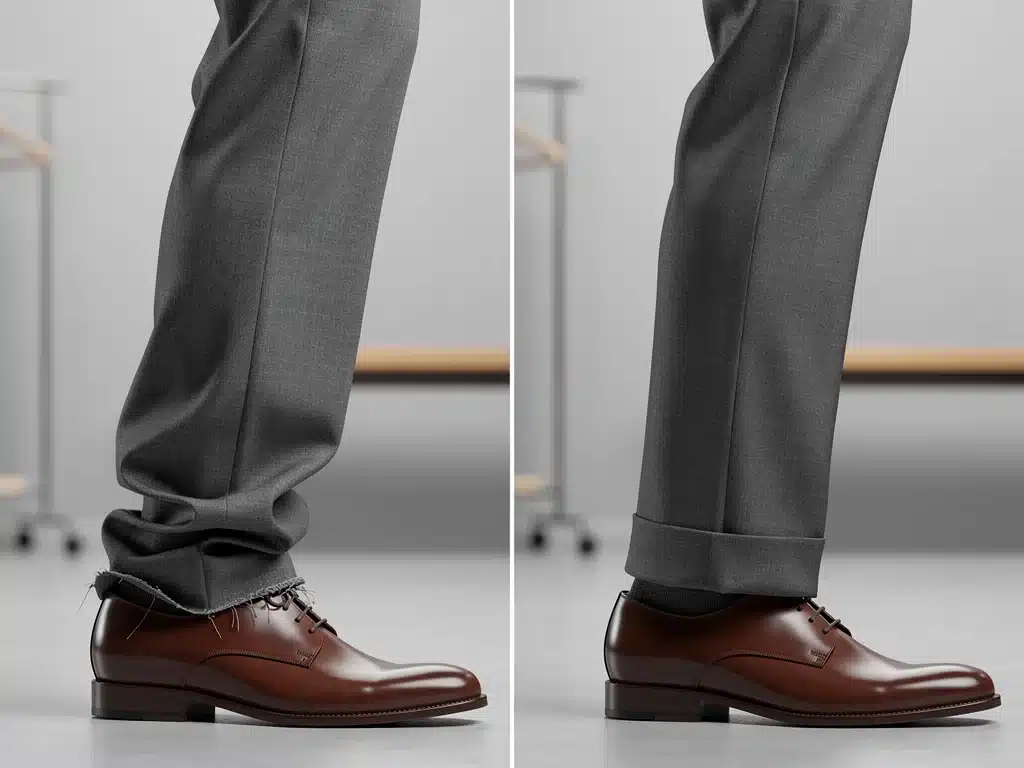
Cuffs provide a clean, weighted finish at the bottom of the trouser leg, contributing to a more structured and polished drape. They are particularly well-suited for dress trousers, wool pants, and some chinos, adding a touch of traditional elegance.
To create cuffs, you generally need a larger hem allowance, typically 3 to 4 inches. The process involves folding the hem up twice, with the final fold creating the desired cuff height.
This technique requires precise pressing and stitching to ensure the cuff lies flat and even, maintaining its crisp appearance through wear.
The decision to add cuffs should align with the trouser style and your personal aesthetic, offering a distinct visual element that sets your trousers apart. This particular alteration is a powerful way to implement 5 Simple Hem Alterations for a truly bespoke feel.
Subtle Tapering for a Modern Silhouette
Tapering the trouser leg is a modern alteration that can dramatically update the silhouette of an older pair of trousers or improve the fit of new high-street finds.
This involves gradually narrowing the trouser leg from the knee down to the hem, creating a more streamlined and contemporary look. It’s particularly effective for trousers that feel too wide or baggy below the knee.
This alteration requires careful pinning and stitching along the inseam and/or outseam, ensuring a smooth, continuous line without any abrupt changes.
It’s advisable to try on the trousers inside out and pin the desired taper before sewing, allowing you to adjust the fit until it’s perfect. The goal is a subtle, natural-looking reduction in width.
A well-executed taper can make your trousers look custom-fitted to your physique, enhancing your overall proportions and giving a more refined appearance. This precise adjustment is an advanced but highly rewarding technique within the scope of 5 Simple Hem Alterations.
Troubleshooting Common Hem Alteration Issues
Even with careful planning, common issues can arise during hem alterations, such as uneven hemlines, puckering, or visible stitches.
Addressing these problems effectively is crucial for achieving a professional finish and ensuring your efforts are not in vain. Understanding the root causes of these issues can help you prevent them in future projects.
Uneven hemlines often stem from inaccurate measuring or marking, or from fabric shifting during the pinning or sewing process. Puckering can be caused by pulling the fabric too taut while sewing, using an incorrect stitch length, or not pressing the hem thoroughly before stitching.
Visible stitches, particularly in blind hems, indicate that too many threads were caught from the main fabric.
Learning to troubleshoot these challenges is an integral part of mastering the art of tailoring and ensures that your 5 Simple Hem Alterations always result in a polished garment. Patience and practice are your best allies in overcoming these hurdles.
Fixing Uneven Hems and Puckering
An uneven hem is a common frustration, but it is often correctable. If your hem is slightly uneven, carefully use a seam ripper to release the stitches in the affected area.
Re-measure and re-mark the hemline precisely, ensuring it is consistent all around. Repin and repress the hem before restitching, paying close attention to keeping the fabric straight and taut without stretching it.
Puckering, where the fabric gathers or wrinkles along the stitch line, can be mitigated by adjusting your sewing machine’s tension settings or increasing your stitch length.
Sometimes, simply pressing the hem thoroughly with steam before and after sewing can resolve minor puckering. For stubborn puckers, a gentle stretch of the fabric while pressing can help smooth it out.
Addressing these issues promptly prevents them from detracting from the overall quality of your alteration. These corrective measures are essential for ensuring your 5 Simple Hem Alterations achieve the desired seamless effect.
Preventing Fabric Fraying and Damage
Preventing fabric fraying is essential for the longevity and neatness of your hem alterations. For single-fold hems on fabrics prone to fraying, consider finishing the raw edge with a zigzag stitch or an overlock stitch (if your machine has one) before folding and stitching.
This creates a durable, enclosed edge that resists unraveling over time.
When cutting fabric, use sharp fabric shears to ensure clean cuts, as dull scissors can chew through the fabric and encourage fraying.
Also, be mindful of the fabric grain; cutting along the cross-grain can sometimes lead to more fraying. For delicate fabrics, a narrow rolled hem can be an elegant solution that completely encases the raw edge.
Taking these preventative steps will ensure that your 5 Simple Hem Alterations are not only aesthetically pleasing but also built to last. Proper preparation and finishing techniques are key to avoiding future garment damage.
Maintaining Your Newly Altered Trousers
Once you’ve applied 5 Simple Hem Alterations, proper care and maintenance are crucial to preserve their custom-tailored look and extend their lifespan. Neglecting care can quickly undo your meticulous work, leading to unraveling hems or loss of shape.
Regular attention to how you wash, dry, and store your trousers will ensure they continue to look their best.
Always follow the garment’s care label instructions, as different fabrics require specific handling. For most trousers, gentle washing and avoiding high heat in dryers are key to preventing shrinkage and preserving stitch integrity.
Proper storage also plays a significant role in maintaining the crispness of your hems and the overall shape of the trousers.
By integrating these maintenance practices into your routine, you protect your investment in both time and effort, ensuring your custom-tailored high-street trousers remain a staple in your wardrobe. This ongoing care is as important as the initial alteration itself.
Washing and Drying Tips for Hemmed Trousers
When washing hemmed trousers, especially those with newly altered hems, always consult the care label for specific instructions. For most fabrics, a cold water wash on a delicate cycle is recommended to minimize shrinkage and protect the stitches.
Turning trousers inside out before washing can also help protect the hem from friction and wear.
Avoid harsh detergents and excessive agitation, which can weaken thread and cause hems to unravel. When drying, air-drying is often the best option to prevent heat-induced shrinkage and maintain the integrity of the fabric and stitches.
If using a dryer, opt for a low-heat setting and remove the trousers while slightly damp to prevent over-drying and wrinkles.
Proper washing and drying techniques are fundamental to prolonging the life of your altered trousers and ensuring the hems remain crisp and intact. These simple habits contribute significantly to the long-term success of your 5 Simple Hem Alterations.
Storing Trousers to Preserve Hem Integrity
How you store your altered trousers can significantly impact the longevity and appearance of their hems. For dress trousers and those with precise hems, hanging them on proper hangers, preferably with clamps that grip the hem, is ideal.
This prevents creasing and ensures the hem hangs straight, maintaining its tailored shape.
Avoid cramming trousers into crowded drawers or closets, as this can crush hems and create unwanted wrinkles.
If folding is necessary for casual trousers, fold them neatly along the creases and lay them flat. For cuffed trousers, ensure the cuffs are neatly folded and pressed before storage to prevent them from becoming misshapen.
Regular steaming or light ironing can also help refresh hems and remove any minor wrinkles that may develop during storage. By implementing these storage practices, you safeguard the meticulous work involved in your 5 Simple Hem Alterations, keeping them ready to wear and looking impeccable.
| Alteration Type | Key Benefit |
|---|---|
| Single-Fold Hem | Quick, minimal bulk, ideal for lightweight fabrics. |
| Double-Fold Hem | Durable, clean finish, suitable for most fabrics. |
| Blind Hem Stitch | Invisible stitches, professional, ideal for formal wear. |
| Cuffs/Tapering | Adds sophistication, modern silhouette, custom fit. |
Frequently Asked Questions About Trouser Hems
The most important factor is achieving the correct length that complements your chosen footwear and the trouser style. An accurate initial measurement, taken while wearing the trousers and shoes, is crucial for a flattering and custom-tailored look, ensuring the fabric drapes perfectly without puddling or appearing too short.
Absolutely. A well-executed hem instantly elevates the perceived quality of trousers by ensuring a proper fit and clean lines. Ill-fitting hems are a common tell of inexpensive garments, so refining this detail can make $40 high-street trousers appear significantly more polished and custom-made, enhancing your overall style.
While a sewing machine offers efficiency and durability, most simple hem alterations can be achieved by hand with a needle and thread. Techniques like the single-fold and double-fold hems, and even a hand-sewn blind hem, are perfectly feasible for beginners. The key is patience and precise marking.
The choice depends on the fabric weight, trouser style, and desired formality. Lightweight fabrics suit single-fold hems to avoid bulk. Most high-street trousers benefit from a durable double-fold. For a formal or invisible finish, a blind hem is ideal. Cuffs add classic sophistication, while tapering modernizes the silhouette.
Common mistakes include inaccurate measuring, uneven marking, pulling fabric too tight while sewing, and neglecting to press the hem. Always measure with shoes on, use pins for evenness, and press thoroughly. Practice on scrap fabric to refine your technique and prevent puckering or visible stitches on your final garment.
Perspectives
The widespread adoption of 5 Simple Hem Alterations represents a significant shift in consumer approach to fashion. This trend underscores a growing desire for personalized style and sustainable practices, moving beyond fast fashion’s disposable mentality.
As more individuals discover the transformative power of minor adjustments, the demand for accessible tailoring skills and resources is expected to rise, influencing both retail offerings and educational content in the fashion sphere.